How to Install Linux, Apache, MySQL, PHP (LAMP) stack on Debian
Apache is the most well-known web server software in the world, with over 50% of all web servers in the world running it.
Before starting the install, it’s important to update the repositories. You can do this by running:
apt-get update
Step 1 – Apache Installation:
To begin the Apache installation, run the command:
apt-get install apache2
You’ll then be prompted
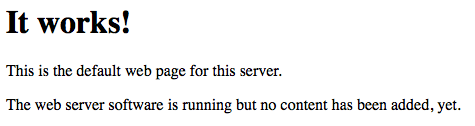
To check that Apache has now been installed, open up a web browser such as Internet Explorer or Google Chrome and type in the IP address of your server in the address bar. (For example http://98.76.54.321)
You should then be presented with a page like this -
If you’re not sure of your server’s IP address, run the following command:
ifconfig eth0 | grep inet | awk ‘{ print $2 }’
Your IP address will then be displayed -

Step 2 – MySQL Installation:
Now we can install MySQL. MySQL is one of the most common database systems and is widely used online.
To start the installation process, run the command:
apt-get install mysql-server
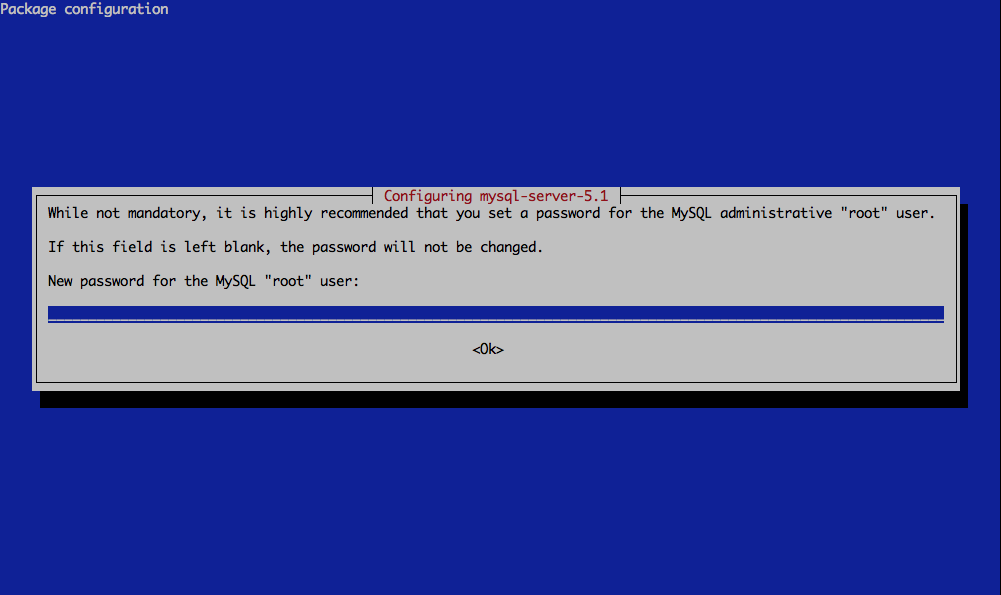
Again, you’ll be prompted to confirm you want to continue the install [Y/n]
At some point during the installation, you will be required to set a root password.
To then setup MySQL, you should run the installation script -
mysql_secure_installation
You’ll then be prompted asking if you wish to change your root password. Type in ‘N’, as you have already set a root password earlier.
There will then be a series of prompts. The easiest way to answer these is to answer Yes [Y] to all.
Step 3 – PHP Installation:
Now it’s time to install PHP!
In this case, we will be installing PHP5.
apt-get install php5 php-pear php5-suhosin php5-mysql
NOTE: If your VPS is running Debian 7, exclude php5-suhosin from the list.
You will now be required to accept two prompts – simply type ‘Y’ to continue.
You will now need to restart Apache by running the following command:
service apache2 restart
Step 4 – Finishing up:
We’ll create a file to test
nano /var/www/info.php
Type in to the document:
<?php
phpinfo();
?>
Then save the document – you can do this by pressing Control+X, then Y then Enter.
To check that PHP is working, type in the IP of your server plus ‘/info.php’. For example, if your server IP was 12.34.56.789, you would type in http://12.34.56.789/info.php You should then be presented with a page that looks something like this: Congratulations – your LAMP system should now be fully functional!
Was this article helpful?
Share the post "How to Install Linux, Apache, MySQL, PHP (LAMP) stack on Debian"