Configure Google Apps for your Domain Name
Most of us still remember the time when keeping your mailbox on your ISP’s servers was usual practice, the days of pre-Web-2.0 when Google email addresses weren’t taken seriously. Well, our thinking has dramatically changed and many businesses today consider using Google as their business messaging and groupware services vendor.
Google’s offering is pretty flexible and can be adapted to your scale of operations; however, setting things up is quite involved and requires some technical knowledge and skills. You need to verify your domain ownership, adjust your DNS according to Google requirements, etc., which sounds downright overwhelming to those without this necessary expertise.
Here is some good news though. WHB has developed a cPanel plugin that lets you switch your communication to Google Apps right from your hosting account management panel with only a few mouse clicks. It’s in internal beta now, and we plan to release it to public beta this month.
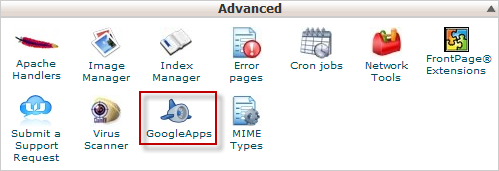
How do you use it? You just enter your cPanel interface and click on the plugin icon which is located under the ‘Advanced’ section.
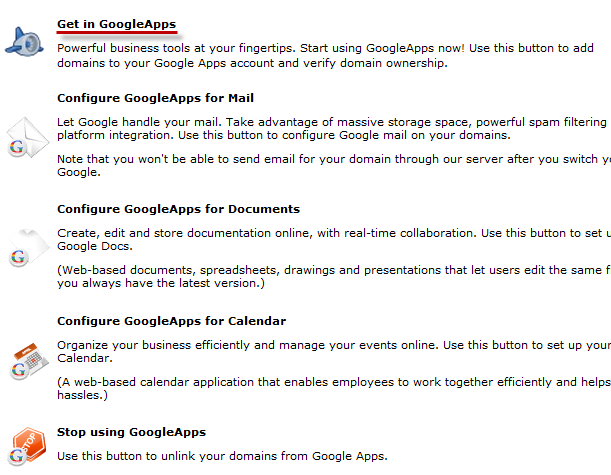
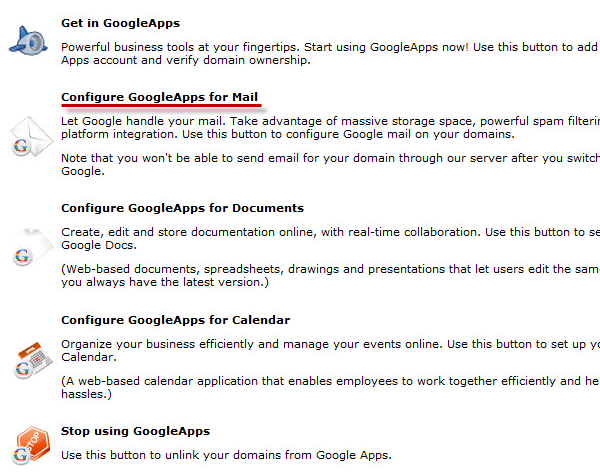
It opens a page with several buttons; the first one you need is “Get in Google Apps”.
When you click on it, the page asks you if you already have a Google Apps account. If you don’t have an account, just choose ‘No’ and you will be able to create it right away.
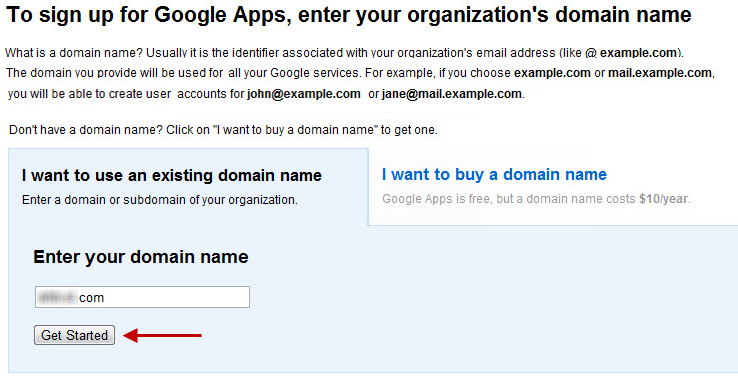
You are redirected to the Google Apps website. Please specify your domain name and click on ‘Get Started’.
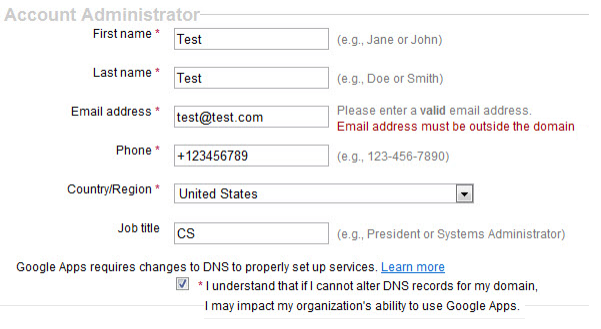
You will be redirected to the sign up page.
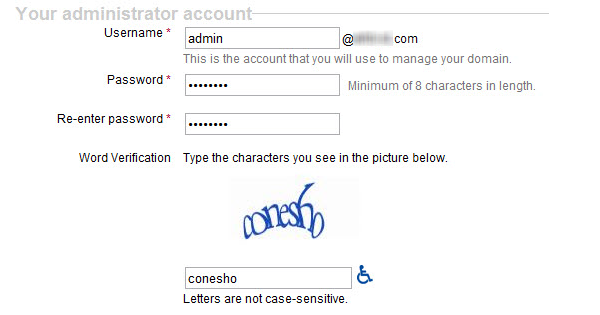
Please fill out the required fields, check ‘I understand that if I cannot alter DNS records for my domain, I may impact my organization’s ability to use Google Apps’ and click ‘Continue’. You will need to create an admin account on the next page.
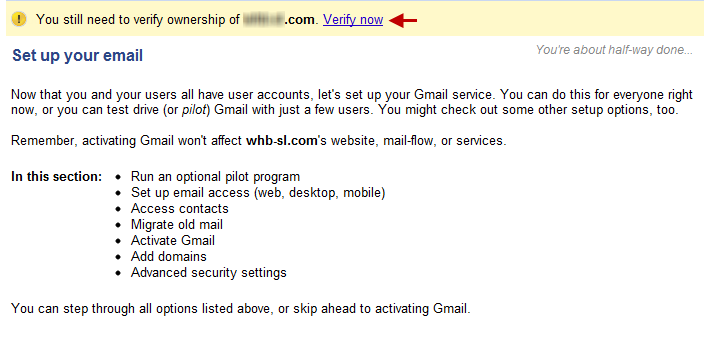
Please fill out the fields and click ‘I accept. Continue with setup’. You will be redirected to Google’s setup wizard. The first thing you need to do is to verify your domain ownership. You will be prompted to do this right away.
Click ‘Verify now’.
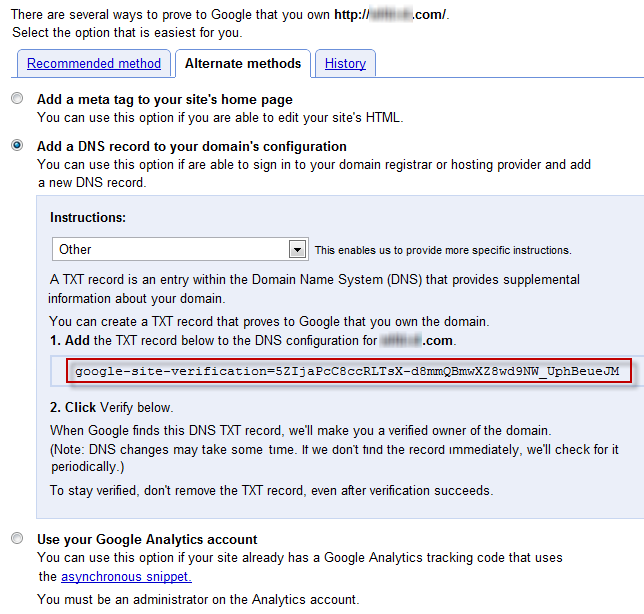
You will be redirected to the domain verification page:
Alternate Methods > Add a DNS record to your domain’s configuration
Choose ‘Other’ as your domain registration provider in the drop-down box. You will see a TXT record, which you will need to copy.
Don’t worry about adding the DNS record, our plugin will do everything for you. Just return to the GoogleApps plugin (by opening it in another tab), and click ‘Get in GoogleApps’ again. And when asked about the GoogleApps account, choose ‘Yes’. You will see a domain verification window. Choose your domain name and paste the code from the GoogleApps website to the ‘Verification code’ field and click ‘Add verification code’. The necessary TXT record will be created automatically.
Now, get back to the GoogleApps website and click ‘Verify’.
The verification should succeed and you can return to the wizard by clicking ‘Continue’. Now, you can go through the rest of the wizard, it’s pretty straightforward from here.
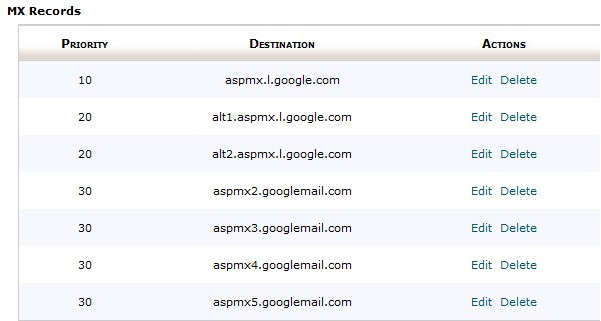
Please keep in mind that in order to use Gmail App for your domain, you will need to point the domain to Google’s servers by adding the corresponding MX records. Our plugin’s got your back here too.
Just go to the Google Apps plugin and click ‘Configure GoogleApps for Mail’.
Choose your domain name and click ‘Configure’.
MX records will be created automatically, and you can double check this in:
cPanel > MX Entry
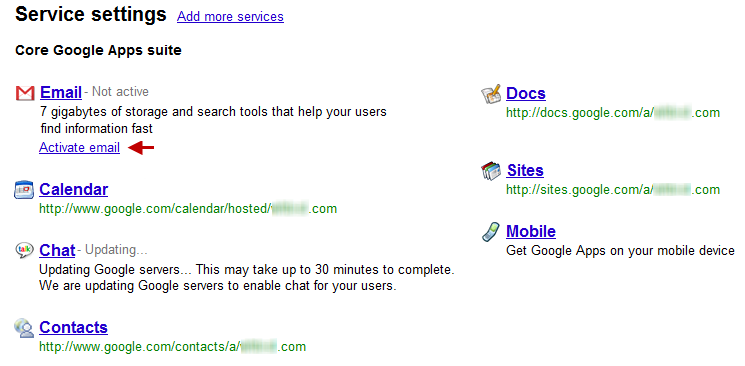
Now, you can enable Gmail in your GoogleApps dashboard.
When prompted to change the MX records, click ’I have completed these steps’.
After this, it may take up to 48 hours to update the mail configuration. As soon as it’s complete, this will be indicated on your dashboard.
There are also special buttons for configuring Docs/Calendar for your domain in our GoogleApps plugin. They will automatically create CNAME records for you to use Docs and Calendar using the respective links docs.yourdomain.com and calendar.yourdomain.com for them. You can set these links in your GoogleApps settings:
Docs(Calendar) > General > Web Address > Change URL
One more button is “Stop using Google Apps”. Again, you need to select a domain, and it reverts all previous changes, made by the plugin, pointing your mail back to your hosting server.
You see, it’s pretty simple, so feel free to give it a try when you see its icon in your cPanel.
You can find more useful documentation on the GoogleApps website:
Was this article helpful?

